How to Install PeerTube
Traducciones al EspañolEstamos traduciendo nuestros guías y tutoriales al Español. Es posible que usted esté viendo una traducción generada automáticamente. Estamos trabajando con traductores profesionales para verificar las traducciones de nuestro sitio web. Este proyecto es un trabajo en curso.
There is now increased interest in federated web applications as alternatives to the major social media sites. Federated servers operate independently in an interconnected manner. PeerTube is a distributed open source variation on YouTube. It allows users to share and enjoy videos without corporate interference or manipulative algorithms. This guide explains how to download, install, and configure a PeerTube instance on a Linode server.
What is a Federated Web Application?
PeerTube is one of the applications comprising the federated web, also known as the Fediverse. The Fediverse is a collection of independent yet interconnected servers. Applications in the Fediverse are decentralized by design. There is no central server or administrative hierarchy. Mastodon is probably the best-known federated web application.
Each server is typically self-hosted, and users can join any public server. In most cases, users can access or post content on multiple servers. The Fediverse is frequently used to host web content, most typically websites, social networks, videos, music, and blogs.
What is PeerTube?
PeerTube is a federated application for decentralized video sharing produced by a French non-profit as a free and open source application. It operates in a distributed manner and allows administrators to create their own video platform. PeerTube does not have any recommendation algorithms or attempt to influence the audience. PeerTube instances can connect to one another to form larger networks, but each owner operates, manages, and moderates their own instance autonomously. Because PeerTube is an open source product, users can suggest modifications to the source code or develop new features themselves.
Some of the main features and advantages of PeerTube are as follows:
- Features allowing content creators to upload and import videos and manage metadata, subtitles, comments, downloads, and privacy settings. Creators can personalize their channels and create public playlists. They retain full extended copyright to their works.
- Live streaming capabilities, allowing creators to publish live videos.
- The ability to post or view videos on different PeerTube servers.
- Integration with ActivityPub to allow users and creators to connect to Mastodon and other federated sites.
- Server bandwidth management for viral videos.
- Peer-to-peer (P2P) functionality, which can be disabled on a per-user basis.
- A customizable user interface and themes.
- NSFW policies.
- A built-in playlist feature. Users can share and interact with videos and playlists.
- The ability to subscribe to channels.
- Advanced search capabilities.
For more information about PeerTube, see the PeerTube FAQ.
Before You Begin
If you have not already done so, create a Linode account and Compute Instance. See our Getting Started with Linode and Creating a Compute Instance guides.
Follow our Setting Up and Securing a Compute Instance guide to update your system. You may also wish to set the timezone, configure your hostname, create a limited user account, and harden SSH access.
Create and configure a domain name to point at the Linode. This domain name provides access to the PeerTube instance. For more information on domains and how to create a DNS record, see the Linode DNS Manager guide.
sudo. If you are not familiar with the sudo command, see the
Users and Groups guide.How to Install PeerTube
PeerTube must be used with the NGINX web server. It does not support Apache. PeerTube recommends PostgreSQL for the database. It is possible to use another database system, but this guide only provides instructions for PostgreSQL.
This guide is recommended for Ubuntu 22.04 LTS users, but is generally applicable for most Linux distributions. For a full list of dependencies and instructions for other systems, see the PeerTube dependencies list.
The PeerTube installation process is subdivided into several sections. To install and configure PeerTube on a Linode, follow these steps:
- Install the PeerTube prerequisites.
- Add directories and configure the database.
- Download and install PeerTube.
- Configure PeerTube.
- Configure the virtual host file and enable HTTPS.
- Tune PeerTube and activate the PeerTube system service.
How to Install the PeerTube Prerequisites
The following section explains how to install the NGINX web server, PostgreSQL database, and supporting software utilities. To configure all PeerTube prerequisites, follow these steps.
Ensure all packages are updated and install some basic utilities. Some of these packages might already be installed on the system.
sudo apt-get update -y && sudo apt-get upgrade -y
sudo apt-get install build-essential gnupg curl unzip
Download Node.js using
curland install it.sudo curl -fsSL https://deb.nodesource.com/setup_16.x | sudo -E bash - sudo apt-get install nodejs -yUse
npmto install theyarnpackage manager.sudo npm install -g yarnThe Python programming language should already be installed on Ubuntu. However, additional Python development packages must also be installed. The
python-is-python3package aliases thepythoncommand topython3.sudo apt install python3-dev python-is-python3Install the NGINX web server.
sudo apt install nginxEnsure the web server is running.
sudo systemctl status nginxnginx.service - A high performance web server and a reverse proxy server Loaded: loaded (/lib/systemd/system/nginx.service; enabled; vendor preset: enabled) Active: active (running) since Tue 2022-12-06 14:35:39 UTC; 15min agoYou may need to press the Q key to exit the output.
Allow web server access through the firewall and enable the firewall. Add permission for the
Nginx Fullprofile to ensure both HTTP and HTTPS are allowed. Run theufw statusto ensureufwis configured properly.sudo ufw allow OpenSSH sudo ufw allow in "Nginx Full" sudo ufw enable sudo ufw statusStatus: active To Action From -- ------ ---- OpenSSH ALLOW Anywhere Nginx Full ALLOW Anywhere OpenSSH (v6) ALLOW Anywhere (v6) Nginx Full (v6) ALLOW Anywhere (v6)Visit the domain URL to ensure the web server is working. The browser should display the NGINX landing page stating “Welcome to nginx”.
Install the remaining prerequisites, including the PostgreSQL database and Redis.
sudo apt install git ffmpeg postgresql postgresql-contrib g++ redis-server -yStart the
redisandpostgresqlservices and ensure all mandatory services are configured to start upon reboot.sudo systemctl start redis postgresql sudo systemctl enable --now nginx postgresql redis-server
How to Create the Required Directories and Database
For the next section of the installation process, create a dedicated PeerTube user and add a PostgreSQL database for the application to use. Follow these steps to create these components.
Create a new
peertubeuser on the Linode and a home directory for them to use.sudo useradd -m -d /var/www/peertube -s /bin/bash -p peertube peertubeAssign a secure unique password for the
peertubeuser.sudo passwd peertubeVerify the directory permissions for the new user directory. Everyone must have read and execute authority, but only the user should be able to write to the directory. The permissions string must be
drwxr-xr-x.Note If execute and read permissions are not set for all users, add them using the commandsudo chmod +rx /var/www/peertube.ls -ld /var/www/peertubedrwxr-xr-x 2 peertube peertube 4096 Dec 7 11:07 /var/www/peertubeSwitch to the new directory and create a PostgreSQL user. Enter a password for the new
peertubeuser when prompted.cd /var/www/peertube sudo -u postgres createuser -P peertubeCreate a PostgreSQL database for PeerTube to use.
sudo -u postgres createdb -O peertube -E UTF8 -T template0 peertube_prodEnable two PostgreSQL extensions.
sudo -u postgres psql -c "CREATE EXTENSION pg_trgm;" peertube_prod
sudo -u postgres psql -c "CREATE EXTENSION unaccent;" peertube_prod
CREATE EXTENSION CREATE EXTENSION
How to Download and Install PeerTube
After all prerequisites are configured, use wget to download PeerTube and yarn to install it.
Query the PeerTube API for details about the current release of PeerTube.
Note The result of the query is assigned to the temporaryVERSIONvariable. You must complete this section and install PeerTube before closing the terminal.VERSION=$(curl -s https://api.github.com/repos/chocobozzz/peertube/releases/latest | grep tag_name | cut -d '"' -f 4) && echo "Latest PeerTube version is $VERSION"Latest PeerTube version is v5.0.0Change to the
peertubedirectory. As thepeertubeuser, create and modify some directories.cd /var/www/peertube sudo -u peertube mkdir config storage versions sudo -u peertube chmod 750 config/Change to the
versionsdirectory and download the PeerTube.zipfile.cd versions sudo -u peertube wget -q "https://github.com/Chocobozzz/PeerTube/releases/download/${VERSION}/peertube-${VERSION}.zip"Unzip the downloaded file and delete the
.zipfile.sudo -u peertube unzip -q peertube-${VERSION}.zip && sudo -u peertube rm peertube-${VERSION}.zipReturn to the
peertubedirectory and create a symbolic link to the file.cd /var/www/peertube sudo -u peertube ln -s versions/peertube-${VERSION} ./peertube-latestChange to the
peertube-latestdirectory. Useyarnto install PeerTube.cd ./peertube-latest sudo -H -u peertube yarn install --production --pure-lockfile
How to Configure PeerTube
PeerTube uses two .yaml files to control its internal configuration. To configure these files, follow these steps.
Change to the
peertubedirectory.cd /var/www/peertubeCopy the
default.yamlconfiguration to theconfigdirectory. Do not edit this file.sudo -u peertube cp peertube-latest/config/default.yaml config/default.yamlFrom the same directory, copy
production.yamlto a new location.sudo -u peertube cp peertube-latest/config/production.yaml.example config/production.yamlCreate a secrets key and save it for the next step.
openssl rand -hex 32Edit the
production.yamlfile.sudo -u peertube nano config/production.yamlproduction.yamlis a large file with many settings. Many of these can either be changed at a later time or adjusted using the web interface. For now, change the following values.- Under the
webserversection, changehostnameto the domain name. This is the URL for the PeerTube instance. In the following example, changeexample.comto the actual domain name. - Under the
secretssection, add the secret key you created in the previous step to thepeertubeentry. - In the
databasesection, change thepasswordto the password for thepeertubedatabase user. - In the
adminsection, change theemailattribute to the administrative email account.
The three sections should resemble the following example. Due to the length of the file, most of the contents are not shown.
Note To enable PeerTube to send emails, fill in the mail server details under thesmtpsection. Email must be enabled on the Linode before PeerTube can send emails.- File: /var/www/peertube/config/production.yaml
 1
 2
 3
 4
 5
 6
 7
 8
 9
10
11
12
13
14
15
16
17
18
19
20
21
22
23
... webserver: https: true hostname: 'example.com' port: 443 ... secrets: # Generate one using `openssl rand -hex 32` peertube: 'your_secret_key' ... database: hostname: 'localhost' port: 5432 ssl: false suffix: '_prod' username: 'peertube' password: 'your_password' pool: max: 5 ... admin: email: 'admin@example.com' ...
- Under the
How to Configure the PeerTube Virtual Host File and Enable HTTPS
NGINX requires a PeerTube virtual host to properly serve the files. Copy the sample peertube virtual host file to the correct location in /etc/nginx/sites-available and edit it. Most of the file is pre-filled, so only a few changes are required.
Use Certbot to install a Let’s Encrypt certificate and enable HTTPS support. For more background on Certbot, Let’s Encrypt certificates, and HTTPS, review the Linode guide to Using Certbot on NGINX.
To configure the NGINX virtual host for HTTP and HTTPS, follow these steps.
Copy the sample NGINX configuration file for PeerTube to the
sites-availabledirectory.sudo cp /var/www/peertube/peertube-latest/support/nginx/peertube /etc/nginx/sites-available/peertubeReplace the
WEBSERVER_HOSTandPEERTUBE_HOSTvariables with the name of the domain and the local port for PeerTube. In the first command, replaceexample.comwith the actual name of the domain.sudo sed -i 's/${WEBSERVER_HOST}/example.com/g' /etc/nginx/sites-available/peertube sudo sed -i 's/${PEERTUBE_HOST}/127.0.0.1:9000/g' /etc/nginx/sites-available/peertubeEnable the
peertubesite.sudo ln -s /etc/nginx/sites-available/peertube /etc/nginx/sites-enabled/peertubeInstall the
snappackage manager. Snap is used to install Certbot.sudo apt install snapd sudo snap install coreRemove any old
certbotpackages and usesnapto install a new one. Create a symbolic link to the directory.sudo apt remove certbot sudo snap install --classic certbot sudo ln -s /snap/bin/certbot /usr/bin/certbotShut down NGINX and use the
certbotcommand to request and install a Let’s Encrypt certificate. Because the HTTPS configuration is already part of thepeertubevirtual host file, use thecertonlyoption. Otherwisecertbotoverwrites much of the existing content. The--standaloneoption tells certbot to use its own internal webserver. Reload NGINX after the certificate is installed.During the certificate granting process,
certbotprompts for some information. To complete the certification, follow these guidelines:- Enter an email address for the administrator when requested to do so. Let’s Encrypt sends renewal notices and other relevant information to this address.
- Enter
Yto agree to the Terms of Service. Certbot terminates the request ifNis entered. - Enter either
YorNwhen asked whether to register with the Electronic Frontier Foundation. This answer does not affect the installation in any way. - Enter the domain name for the PeerTube server.
After completion,
certbotconfirms the certificate is installed. It automatically schedules a task to renew the certificate when it is about to expire.Note Because the virtual host file is pre-filled, NGINX must be shut down first. Thecertbotrequest fails if it is operational.sudo systemctl stop nginx sudo certbot certonly --standalone --post-hook "systemctl restart nginx" sudo systemctl reload nginxSuccessfully received certificate. Certificate is saved at: /etc/letsencrypt/live/example.com/fullchain.pem Key is saved at: /etc/letsencrypt/live/example.com/privkey.pem This certificate expires on 2023-03-07. These files will be updated when the certificate renews. Certbot has set up a scheduled task to automatically renew this certificate in the background.
How to Tune PeerTube and Activate the PeerTube Service
A few more steps are required before PeerTube is finally ready to use. PeerTube requires different Transfer Control Protocol (TCP) settings than most applications. PeerTube must also be registered as a system service. This allows users to control it using systemctl. To finalize the PeerTube configuration, complete these steps.
Copy the PeerTube TCP file to the system settings.
sudo cp /var/www/peertube/peertube-latest/support/sysctl.d/30-peertube-tcp.conf /etc/sysctl.d/Enable the PeerTube TCP settings.
sudo sysctl -p /etc/sysctl.d/30-peertube-tcp.confnet.core.default_qdisc = fq_codel net.ipv4.tcp_congestion_control = bbrEnable the PeerTube service. Copy the default service file to the
/etc/systemd/system/directory.Note The default configuration should suffice for most instances. To confirm the service settings, review the/etc/systemd/system/peertube.servicefile.sudo cp /var/www/peertube/peertube-latest/support/systemd/peertube.service /etc/systemd/system/Reload the
systemctldaemon.sudo systemctl daemon-reloadRegister the
peertubeservice to start automatically upon system boot.sudo systemctl enable peertubeStart the
peertubeservice.sudo systemctl start peertubeVerify the status of the
peertubeservice and ensure it isactive.Note If the service is not running, review the service logs using the commandsudo journalctl -feu peertube.sudo systemctl status peertubepeertube.service - PeerTube daemon Loaded: loaded (/etc/systemd/system/peertube.service; enabled; vendor preset: enabled) Active: active (running) since Thu 2022-12-08 10:14:28 UTC; 17s agoYou may need to press the Q key to exit the output.
The default administrative account for PeerTube is named
root. Although the password can be found in the logs defined in theproduction.yamlfile, it is easier to reset the password. Switch to thepeertube-latestdirectory and use the following command to set a unique secure password for the PeerTuberootaccount. Supply the new password when prompted to do so.cd /var/www/peertube/peertube-latest sudo -u peertube NODE_CONFIG_DIR=/var/www/peertube/config NODE_ENV=production npm run reset-password -- -u rootNew password? User password updated.
How to Use and Administer PeerTube
Although the various PeerTube configuration files can be edited to change the site behavior, most changes can be made through the administration panel. To access the panel, follow these steps.
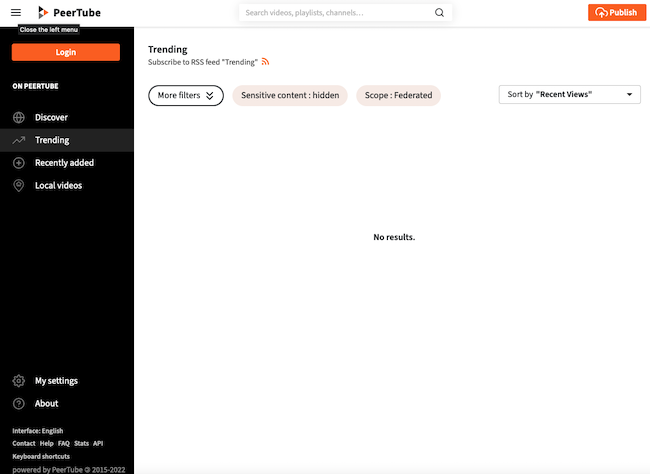
Navigate to the PeerTube domain. The web browser displays the default welcome page for PeerTube. Click the Login button on the upper-left-hand side to access the login page.

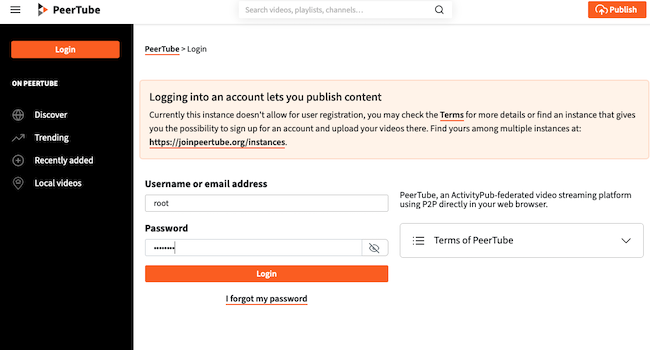
To log in as an administrator, use
rootas the user name. Enter the administrator password configured in the previous section. Click the Login bar to continue.
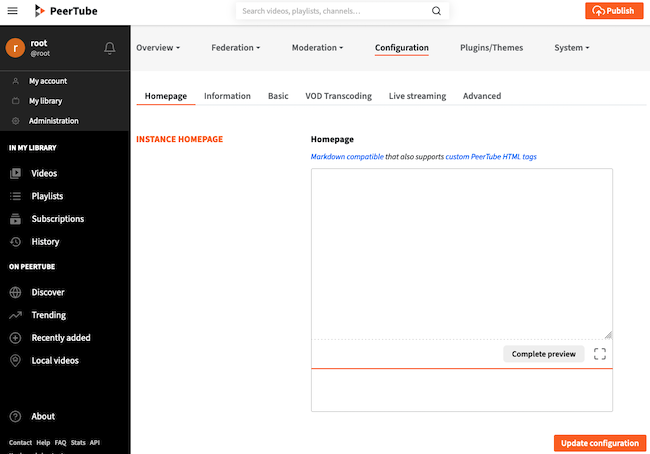
PeerTube now displays the main user and administration page. From here, the administrator can post or watch videos and manage the PeerTube instance. For more information on how to use and administer PeerTube, see the PeerTube documentation.

Conclusion
PeerTube is a federated application that allows users to watch or post videos on a distributed network of servers. It includes a wide range of features for both creators and audiences. To install PeerTube, first download and configure the NGINX web server, PostgreSQL database, and other supporting packages. Download PeerTube using wget and install it using yarn. To complete the PeerTube installation, configure an NGINX virtual host, two PeerTube .yaml files, and the TCP settings. For more information about PeerTube, visit the PeerTube website.
More Information
You may wish to consult the following resources for additional information on this topic. While these are provided in the hope that they will be useful, please note that we cannot vouch for the accuracy or timeliness of externally hosted materials.
This page was originally published on
